|
|
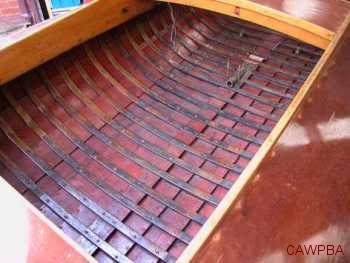
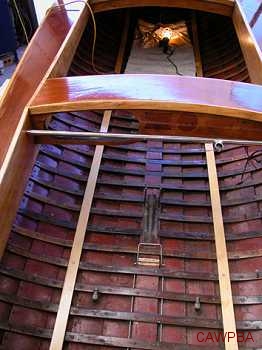
Stripping the hull back to the stage where everything that could be taken out was in fact taken out, in many ways was the starting point for the project. With all the disassembly work completed it was time to actually look at what we had to work with. Fortunately there was absolutely no timberwork required at all to the hull or deck. The planks, ribs and deck all checked out as being in great condition. The cross bearers were shot and the ply under the bearers was also oil soaked and earmarked for replacement.
|
|
|
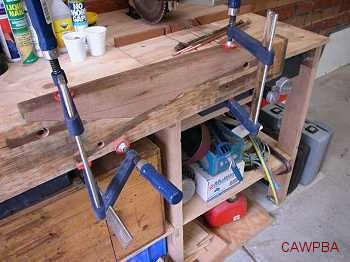
A lot of time was spent sanding the bearers to get them back into reasonable shape. There were a handful of holes to be drilled out and plugged and somewhere along the way someone had hacked into the starboard bearer under the seat. This needed to be cut out and repaired also. |
|
|
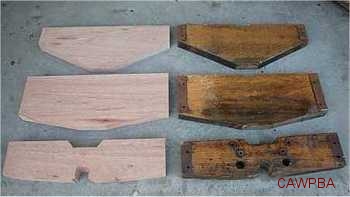
Five coats of varnish later and the bearers were ready to go back in. The cross bearers were made up using the old pieces as patterns, although finding Meranti of the correct size proved difficult for a while. Before the reassembly began, the inside of the hull was pressure cleaned to remove as much crud and build up as possible, not that there was much to begin with. In between the transom and the first rib some of the inside of the planking showed some bare timber, so this was primed then sealed.
|
|
|
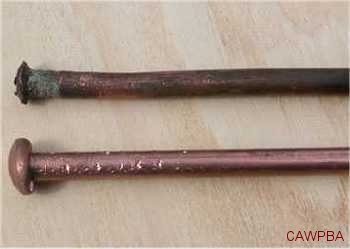
During the strip down process the decision was taken to replace anything that looked suspect in terms of serviceability or even in terms of coming up with better technology to do the same job. A case in point was the centre copper bolts that pass through the keel and the cross bearers. The original bolts were bent a little out of shape and the heads had been fabricated with a ball peen hammer and no doubt ample patience. New copper bolts were made up with a better-formed mushroom head. |
|
|
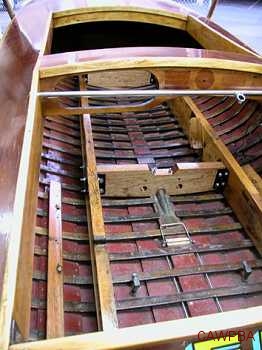
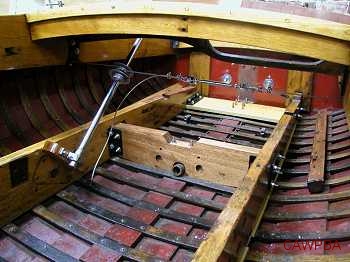
Bearers Slip Back InNewly varnished bearer pads were slipped into the hull, followed by the cross bearers and finally the bearers. All the angle iron brackets on the bearers were replaced with heavier steel brackets and new stainless steel fasteners replaced the old mild steel bolts that had rusted and seized. Installing the bearers took a full day, given the need to assemble the components, so as to line up brackets so that new holes could be drilled through the cross bearers and angle iron.
|
|
|
All the bolts that passed through the bearers had originally been fitted with flat washers under the retaining nuts. Over the years these had been pulled into the timber. To overcome this problem, new steel backing plates were made up, drilled and painted gloss black. With the bearers in we had gone from pulling Rebound apart to finally putting it back together. This was the time that we felt we had turned the corner on the project.
|
|
|
During the disassembly process various components were also being sourced and made up. The gearbox mounts had to be replaced, new fuel tanks made, new prop shaft, SS steering cable and so on. Bits and pieces were also being sourced for the engine. This list was quite a bit longer with a new sump, exhaust pipes, starter motor, oil filter adaptor, dipstick, rocker covers, magneto service, plug leads, oil pump …. Along the way there were some serious misgivings about the Stromberg 97 carbies… all 6 of them. Years of inactivity have rendered the carbs a little worse for wear. Exterior parts are rusted, some have lost the protective zinc(?) coating and there are just a few bits and pieces missing. Although they will ultimately be re-built, the task is a significant one given the need to find parts, gaskets and the know how to do the job.
|
|
|
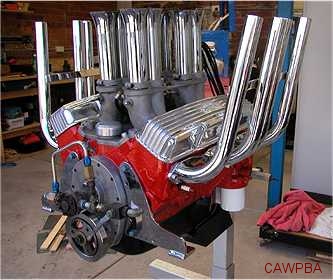
In the meantime a set of Hilborn fuel injection came along at a great price so that was snapped up. This will hopefully allow us to get the boat operating a lot sooner than if we wait for the carbs to be stripped and re-built. The injection with the chrome ram tubes looks sensational and will be a good interim fuel system. As a rule of thumb it seemed that for every hour spent actually working on the boat, there was at least another hour spent sourcing and chasing components and gear to actually do the task.
|
|
|
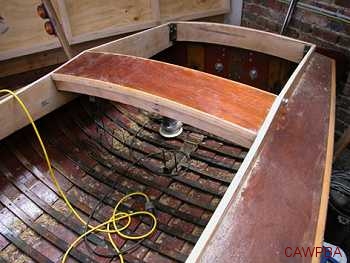
The DeckNext came the deck. The deck presents a real dilemma - small parts of it are water affected both in getting under the varnish and also affecting the veneer. The side decks have been replaced at some stage, but with a different veneer and on the front port section of the deck the veneer looks as though it has dried out and started to pull apart slightly to leave tiny grooves. Also the deck has been stained, so the sanding process had to be done with a very light touch. After hand rubbing with fine wet and dry, the first coat of varnish went on and it looked okay. More sanding and a second coat went on. The deck looks good and will need more coats of varnish after the engine is fitted. Maybe one day a new deck might go on, we'll just see how it all turns out first.
|
|
|
Fit UpWith the varnishing over for the time being, we got into the fit out in earnest. First in was the steering. The pulleys either side of the steering drum were stripped and rebuilt, new stainless cable fitted and a new turnbuckle installed. The steering went in easily, although a 1960's style steering wheel needs to be found yet.
|
|
|
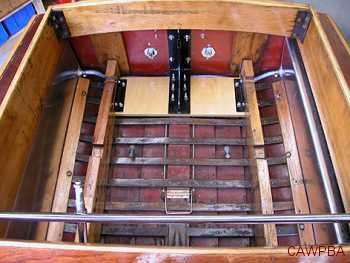
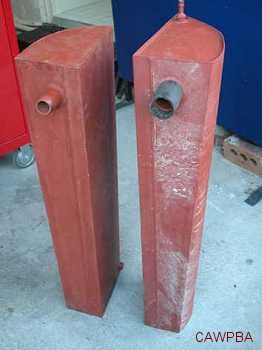
Next came the fuel tanks. The old galvanised tanks were shot with
rust, but they were more than useful as a pattern for the aluminium
man (Andrew Day) to build two new tanks. At a guess each tank holds
about 35 litres of fuel and they are joined across the back with a
balance hose with each tank vented through the top plank on each
respective side. The 'saddle' tanks essentially rest in position with not a lot holding them in place. The outside of the tank rests against the ribs, but as the rivets and roves protrude I was concerned about the inevitable movement of the copper against the aluminium. To help alleviate any future problems, rubber was adhered to the aluminium. Steering and tanks in, next was the Z drive gearbox. The shaft log was in good condition although the old galvanised hose clamps were replaced with stainless steel clamps. A new prop shaft had already been made up and this was inserted from the engine end, through the log and into the skeg, as the rudder was already installed. |
|
|
Again lots of time seemed to be taken up with cleaning and washing parts, with relatively little time spent assembling and installing. New bolts went into the split coupling and a groove had to be filed into the top end of the prop shaft for the lock bolt on the coupling. Keyways were cleaned and inspected. Finally the gearbox with mounts was lifted into position and bolted to the bearers. The propshaft slipped up into the split coupling and locked in. It was all too easy! Likewise the engine mounts had been chromed, new backing plates made and then all bolted back into place.
|
|
|
At this stage Rebound is mostly ready to have the engine fitted.
|
|
|
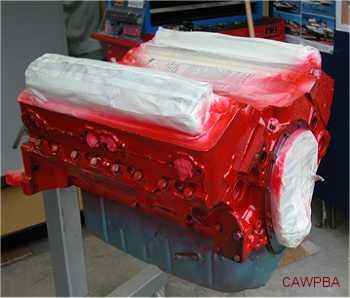
The Engine Our next task was to do a loose assemble on the engine. Along the way, the cylinder block and heads had been buffed back and painted the traditional Edgar McDonald colour of fire engine red. Thank goodness the puke blue is at long last gone. Over the past 6 months or so engine components have been gradually acquired and it was now time to find out what we were short on. A loose engine assembly produced a list of fasteners that needed to be acquired. With a lot more chrome and polished aluminium going onto the block, the old steel hex headed bolts no longer looked the part! With the red block and all that chrome work, injection and zoomies… the engine looked sensational.
|
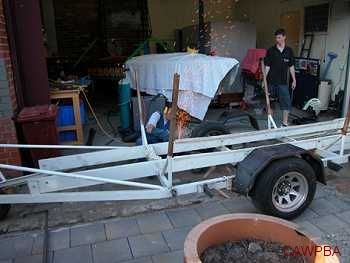 |
More on the TrailerFinally, the end of the Christmas holidays proved to be the best time to take off the old mudguards and fit new ones. The old guards were now too small with the new (wider) axle fitted. The new guards are wider and sit a lot lower. Timber step plates are being incorporated and the trailer is to be given a coat of white paint before the boat is lifted back on board. The next effort will be directed to finishing off the trailer (Jarrah timber steps & paint the steel work white) and then a final assembly on the engine stand of the Chev before installation.
|